
Mastering the Blue Yeti Microphone with Tips & Setup

Whether you’re diving into podcasting, streaming, or simply upgrading your audio recording setup, the Blue Yeti microphone stands as a popular choice for many content creators. Known for its versatility, robust design, and user-friendly features, the Blue Yeti microphone has become a staple in the realm of USB microphones. In this guide, we’ll delve into its features, how to use it effectively, and tips to get the best sound quality.
Understanding the Blue Yeti Microphone
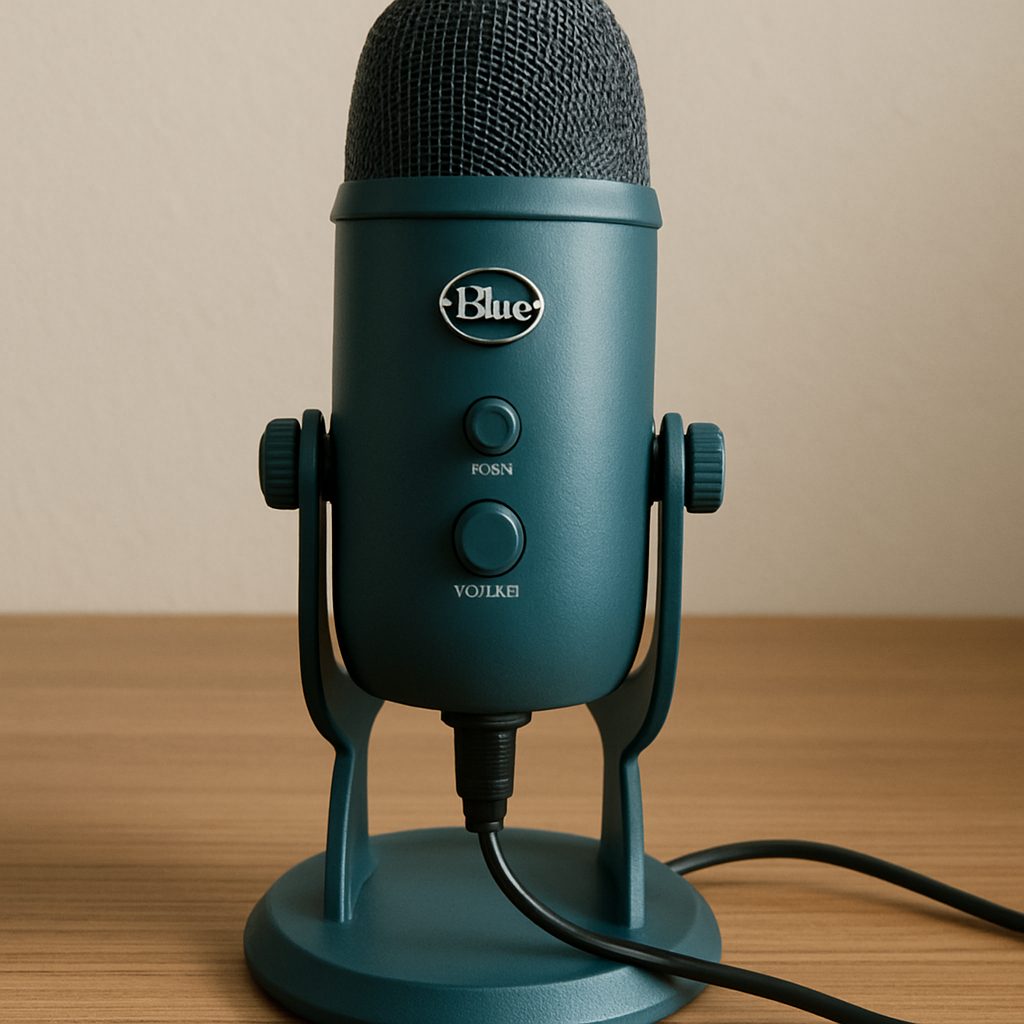
The Blue Yeti microphone is a condenser mic that connects via USB, making it incredibly easy to set up and use without the need for additional interfaces or equipment. It’s renowned for its versatility, thanks to various recording patterns and modes.
Key Features
The Blue Yeti microphone offers several features that make it stand out in the crowded market of recording devices:
- Multiple Pickup Patterns: Cardioid, omnidirectional, bidirectional, and stereo. These patterns allow the microphone to be used in a range of scenarios, from solo podcasts to group discussions, enhancing its adaptability.
- Built-in Gain Control: Adjust the microphone’s sensitivity. This feature is crucial for tailoring the microphone’s input level to suit different voices and recording environments, ensuring clarity and preventing audio distortion.
- Mute Button: Instantly mute the mic with a simple press. This is particularly useful during live broadcasts or recordings to quickly handle unexpected interruptions or noises.
- Headphone Output: Zero-latency monitoring. This lets users hear exactly what the microphone is capturing in real-time, making it easier to adjust settings and achieve the desired audio quality.
Blue Yeti Mic Modes
The Blue Yeti offers different modes to cater to various recording needs:
- Cardioid Mode: Ideal for podcasts, voice-overs, and streaming. It captures sound from the front while reducing noise from the sides and rear, focusing on the speaker’s voice to deliver clear and direct audio.
- Omnidirectional Mode: Captures sound equally from all directions, perfect for group recordings. This mode is especially useful in situations where multiple speakers are involved, as it captures a balanced audio from every angle.
- Bidirectional Mode: Records from the front and back, suitable for interviews. It picks up sound from two opposite sides, making it excellent for face-to-face interviews or duet performances.
- Stereo Mode: Uses both left and right channels for a rich sound experience, great for music recording. This mode creates a sense of space and dimension, capturing the nuances of musical performances or ambient sounds.
Advanced Features and Design
The Blue Yeti’s design is not only functional but also aesthetically pleasing, with its sturdy build and sleek appearance making it a favorite among users:
- Sturdy Build: The microphone’s robust construction ensures durability, making it a long-lasting investment for serious content creators.
- User-Friendly Design: With intuitive controls and clear labeling, even beginners can quickly get the hang of its features without a steep learning curve.
- Versatile Aesthetic: Available in various colors and finishes, the Blue Yeti complements different setups and personal styles, enhancing both functionality and visual appeal.
How to Use the Blue Yeti Microphone
Blue Yeti Setup
Setting up your Blue Yeti microphone is straightforward:
- Connect the Microphone: Plug the USB cable into your computer and the microphone. This simplicity eliminates the need for external audio interfaces, making the process quick and hassle-free.
- Select the Microphone: In your computer’s sound settings, select the Blue Yeti as your input device. Ensure it’s recognized and configured correctly to prevent any audio issues during recording.
- Adjust Settings: Set the gain dial to an appropriate level to avoid distortion. Finding the right balance is key to capturing clear audio without unwanted noise or clipping.
- Choose the Right Mode: Depending on your recording needs, select the mode using the pattern selector. Tailoring the mode to your specific situation ensures optimal sound quality and clarity.
Blue Yeti Microphone Settings
To get the best sound quality, consider these settings:
- Gain Control: Adjust the gain to ensure your voice is clear without peaking. Proper gain setting is crucial for maintaining audio integrity and avoiding distortion.
- Microphone Position: Place the mic close to your mouth at a slight angle to minimize plosives. This position helps capture the full richness of your voice while reducing harsh sounds.
- Pop Filter: Use a pop filter to reduce harsh sounds caused by plosive consonants. This inexpensive accessory can significantly improve audio quality by softening explosive sounds.
Enhancing Your Recording Environment
Creating the right environment is just as important as the microphone settings:
- Quiet Space: Record in a room with minimal background noise to avoid distractions and ensure clear audio.
- Soft Furnishings: Use curtains, carpets, or foam panels to reduce echo and improve acoustics.
- Consistent Testing: Regularly test your setup before important recordings to ensure all settings are optimal and functioning as expected.
Tips for Using the Blue Yeti Microphone
- Monitor Your Sound: Use the headphone output to hear your voice in real-time. This allows you to catch and adjust any audio issues on the spot, ensuring consistent quality.
- Room Acoustics: Record in a quiet room with minimal echo for the best results. A well-controlled environment can make a substantial difference in audio clarity and professionalism.
- Regular Maintenance: Dust the microphone regularly and keep it covered when not in use. Proper care extends the lifespan of the microphone and maintains its performance.
Advanced Usage Tips
Taking your recording to the next level involves a few additional considerations:
- Cable Management: Use cable ties or organizers to keep the USB cable tidy and avoid interference or accidental disconnections.
- Power Source: Ensure your computer or recording device provides consistent power to avoid audio dropouts.
- Software Optimization: Use recording software that allows for fine-tuning and post-processing to enhance the final output quality.
Blue Yeti Microphone Accessories
To enhance your recording experience, consider investing in these accessories:
- Boom Arm: A recommended boom arm for the Blue Yeti can provide flexibility and reduce desk noise. It allows for precise positioning and minimizes vibrations from surface movements.
- Microphone Cover: A cover can protect the mic from dust and reduce plosive sounds. This simple addition helps maintain audio quality and prolongs the microphone’s lifespan.
- Shock Mount: Helps isolate the mic from vibrations and handling noise. This accessory is essential for reducing unwanted noise and ensuring clean, professional recordings.
Additional Accessories
Consider these additional tools to further improve your setup:
- Pop Filter: Essential for reducing plosive sounds, especially in vocal recordings.
- Acoustic Panels: These can be strategically placed to absorb sound reflections and enhance recording quality.
- USB Hub: If you have multiple devices, a powered USB hub can ensure stable connections and power supply for your Blue Yeti.
Blue Yeti Microphone Driver and Software

by Bruno Yamazaky (https://unsplash.com/@mryamazukino)
The Blue Yeti is plug-and-play, meaning it doesn’t require additional drivers for most computers. However, for optimal performance, ensure your computer’s operating system is updated. If you encounter issues, check for specific drivers or software updates from Blue Microphones.
Ensuring Compatibility
To ensure your Blue Yeti functions without issues:
- Operating System Updates: Regularly update your OS to maintain compatibility and access the latest features.
- USB Port Check: Use a reliable USB port to prevent connection problems and ensure stable performance.
- Manufacturer Resources: Check Blue Microphones’ website for any firmware updates or additional software tools that can enhance the microphone’s capabilities.
Software Integration
The Blue Yeti can be used with various recording and streaming software:
- DAW Compatibility: Works seamlessly with popular digital audio workstations (DAWs) for music and audio production.
- Streaming Platforms: Easily integrates with streaming software like OBS Studio or Streamlabs for live broadcasts.
- Custom Settings: Some software allows for custom equalizer settings and effects to tailor the audio to your preferences.
Blue Yeti Microphone Review
The Blue Yeti microphone is often praised for its versatility, sound quality, and ease of use. Users appreciate its robust build and the flexibility provided by multiple pickup patterns. Whether you’re recording a podcast, streaming a game, or conducting interviews, the Blue Yeti delivers professional-grade audio.
Pros
- High-Quality Sound: Delivers clear and rich audio. Its condenser capsule technology ensures detailed and accurate sound reproduction.
- Versatile Modes: Suitable for a variety of recording situations. The multiple pickup patterns make it adaptable to different environments and needs.
- User-Friendly: Easy setup and operation. Even those new to audio recording will find it intuitive and straightforward to use.
Cons
- Size and Weight: It’s relatively large, which might be cumbersome for some setups. Its bulk can be a challenge for small desks or portable use.
- Desk Noise: Without a boom arm or shock mount, it can pick up desk vibrations. This can affect the sound quality, especially in active environments.
User Feedback
Feedback from users highlights several key points:
- Durability: Many users commend its build quality, noting its resilience under frequent use.
- Aesthetic Appeal: The microphone’s design and color options are often praised for adding a professional look to any setup.
- Value for Money: Users often mention the excellent value provided, given its feature set and performance.
Troubleshooting Common Issues
Sound Is Too Loud on Blue Yeti Microphone
If your recordings are too loud or distorted, try reducing the gain or moving the microphone further away. Adjust the input level in your computer’s sound settings.
Microphone Not Recognized
Ensure the USB cable is securely connected and try a different USB port. Restart your computer and check for any required updates or drivers.
Additional Troubleshooting Tips
To resolve other common issues:
- Interference Issues: Ensure cables are not tangled or near power sources that could cause interference.
- Software Conflicts: Close unnecessary applications that might be accessing audio resources.
- Hardware Check: Inspect the microphone and cable for physical damage or wear that could affect performance.
Conclusion
The Blue Yeti microphone remains a top choice for content creators due to its exceptional audio quality and versatility. By understanding its features and settings, you can maximize its potential and produce high-quality recordings. Whether you’re a beginner or an experienced professional, the Blue Yeti is a reliable tool for all your audio recording needs.
Final Thoughts
Reflecting on the Blue Yeti’s impact:
- Innovation in Audio Recording: The Blue Yeti has set a standard in USB microphones, offering features typically found in more expensive models.
- Broad Appeal: Its ease of use and adaptability make it suitable for a wide range of users, from hobbyists to professionals.
- Future-Proof Choice: With regular software updates and a robust design, the Blue Yeti is poised to remain relevant for years to come.